This wine rack would be a great gift for Christmas or a birthday, especially if you include a bottle of wine! If you purchase a 1"X4"X10' board you could make 8 of these for gifts. A clear cedar board in that size will run you less than $8.00 at Square Deal.
Easy DIY Wine Rack

Materials needed:
1" x 4" board cut to 15"
Measuring Tape
Pencil
Straightedge or ruler
Miter saw
Drill with 1-1/2-inch hole saw or Forstner bit
Sandpaper (medium and fine-grain)
Paintbrush
Paint or stain
1" x 4" board cut to 15"
Measuring Tape
Pencil
Straightedge or ruler
Miter saw
Drill with 1-1/2-inch hole saw or Forstner bit
Sandpaper (medium and fine-grain)
Paintbrush
Paint or stain
INSTRUCTIONS:
 STEP 1
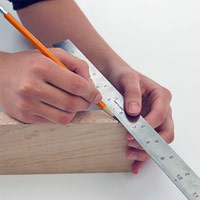
 1. To mark the correct angle for the base, measure 14-1/8 inches from one end. Using the straightedge and pencil, draw a horizontal line across the face of the board. Flip the wood over and draw another horizontal line 13-3/4 inches from the end. Then turn the project on its side and using the straightedge, connect the two horizontal lines.
 STEP 2
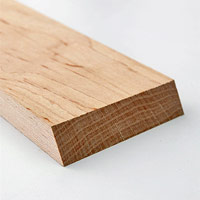
 2. Use a power miter saw (chop saw) to cut the marked angle as shown. This angle must be exact in order for the wine bottle to balance.
 STEP 3
 3. Opposite the angled edge, draw a small horizontal line in the center of the wood 3-1/8 inches from the top. Then mark a small vertical line 1-3/4 inches from either side of the board to create a crosshair.
 STEP 4
 4. Use the drill and 1-1/2-inch bit to carve a hole, aligning the bit with the crosshair. To avoid damage to your work station or the piece, you may want to clamp a piece of scrap wood under the project for this step.
 STEP 5
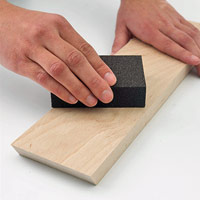
 5. Use the medium-grain sandpaper to smooth around the hole and other rough edges. Then go over the piece with the fine-grain sandpaper. After sanding, paint, stain, or oil the stand as you please. Once it is dry, try it out!
 RSS Feed