 | 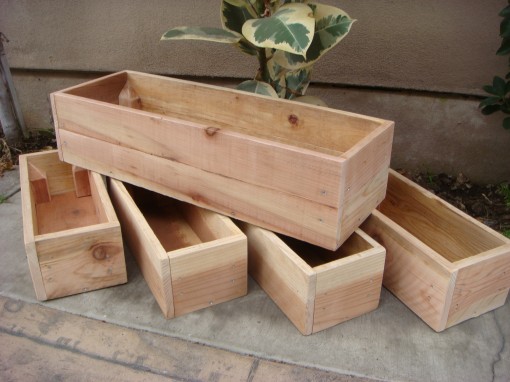 |
Raised garden beds and planter boxes enhance the beauty and appeal of a deck, patio or entrance, adding color to it and encouraging different birds, bees and butterflies to frequent your space. Large planter boxes lined together, or placed in a few strategic spots outside your house, provide natural decoration and spruce up the surrounding landscape. You can create one in whatever size will fit your needs. These instructions are for a planter that is 36 inches long and 24 inches wide, with a height of 12 inches. Paint it to match the exterior of your house or in a complementary color. All materials are available at Square Deal Lumber.
Step 1
Purchase good quality wood (redwood or cedar) that is resistant to insects and wood rot. Cut it to size with a saw, or have a professional cut it for you. You will need five boards for your planter: two 12-by-36 inch pieces for the front and back, two 12-by-24 inch boards for the sides, and a base piece that is 36 inches long and 24 inches wide (exterior plywood will work).
Step 2
Drill several 1-inch drainage holes in the base piece, spaced equally apart.
Step 3
Lay the front piece on a flat and even surface. Place a side piece flush against it, making sure the joint is even and flush. Drill a 2-inch galvanized wood screw near the top edge of the side piece, which will penetrate through the side piece into the front board to join them together. Drill another wood screw near the lower edge, and any additional wood screws if you want a secure fit. You will have a structure that resembles an "L."
Step 4
Hold the back piece against the short side of the structure, aligning it to make sure the tops are at the same level and the joint is flush. Join it to the structure by drilling 2-inch galvanized woodscrews through the edge. Repeat the procedure with the second short side so it is attached to the structure and your large planter resembles a box that has no lid or base.
Step 5
Carefully lift the planter and turn it over so the lower side faces upward. You may need someone to help you turn it. Lower the base piece over the box and secure it by drilling several 2-inch galvanized wood screws into each edge. Turn it over and review your planter box.
Step 6
Sand the edges, corners and crevices to remove any splinters and give it a smooth finish. Apply colored or clear acrylic paint to the planter so it will last longer.
Tips and Warnings
- Always wear safety glasses and earplug when using a drill to prevent injury.
- Five redwood or cedar boards, plus a 36" x 24" piece of plywood for base
- Gloves
- Measuring tape
- Circular saw
- Protective eyeglasses
- Earplugs
- Drill
- 2-inch galvanized wood screws
- Sandpaper
- Paint
- Gardenguides.com
 RSS Feed